August 28, 2012

My Style Wall

Today's project is a corkboard to organize all my jewelry.  I like finding that perfect little kick to an outfit and  love to make my own jewelry too!  I've always found it impossible to keep things from tangling in a jewelry box and things have gotten especially bad since I've moved.  Most of my jewelry was still packed in bags because I didn't have anywhere nice to keep them.
I've known about using corkboards as a jewelry board for awhile now and I'm glad I finally found an opportunity to make one for myself.  I love the way it turned out.


Ok, it's a huge corkboard.  The reason I used it was I already had it hanging around, unused.  It'll be fine, but it is going to take up a significant portion of my wall.  

Color-wise, I wanted something simple.  I considered black and white, but I didn't want that much white hanging around.  Instead I chose a light blue background with a black border.


STEPS:
My board taped and sanded.
  • Begin by painting the blue area. When I did mine I wasn't very careful to stay 'inside the lines' but that's ok since the border was smooth and the paint just scratched off.  
  • When that is was dry tape off the border to keep the lines clean.  Be sure to sand the edges before you paint them.  This gives the paint something to grip so it doesn't just scratch off anymore.  It doesn't take mush sanding to be effective.
  • Paint the edges.
  • Wait for the paint to dry. (tick tock tick tock)
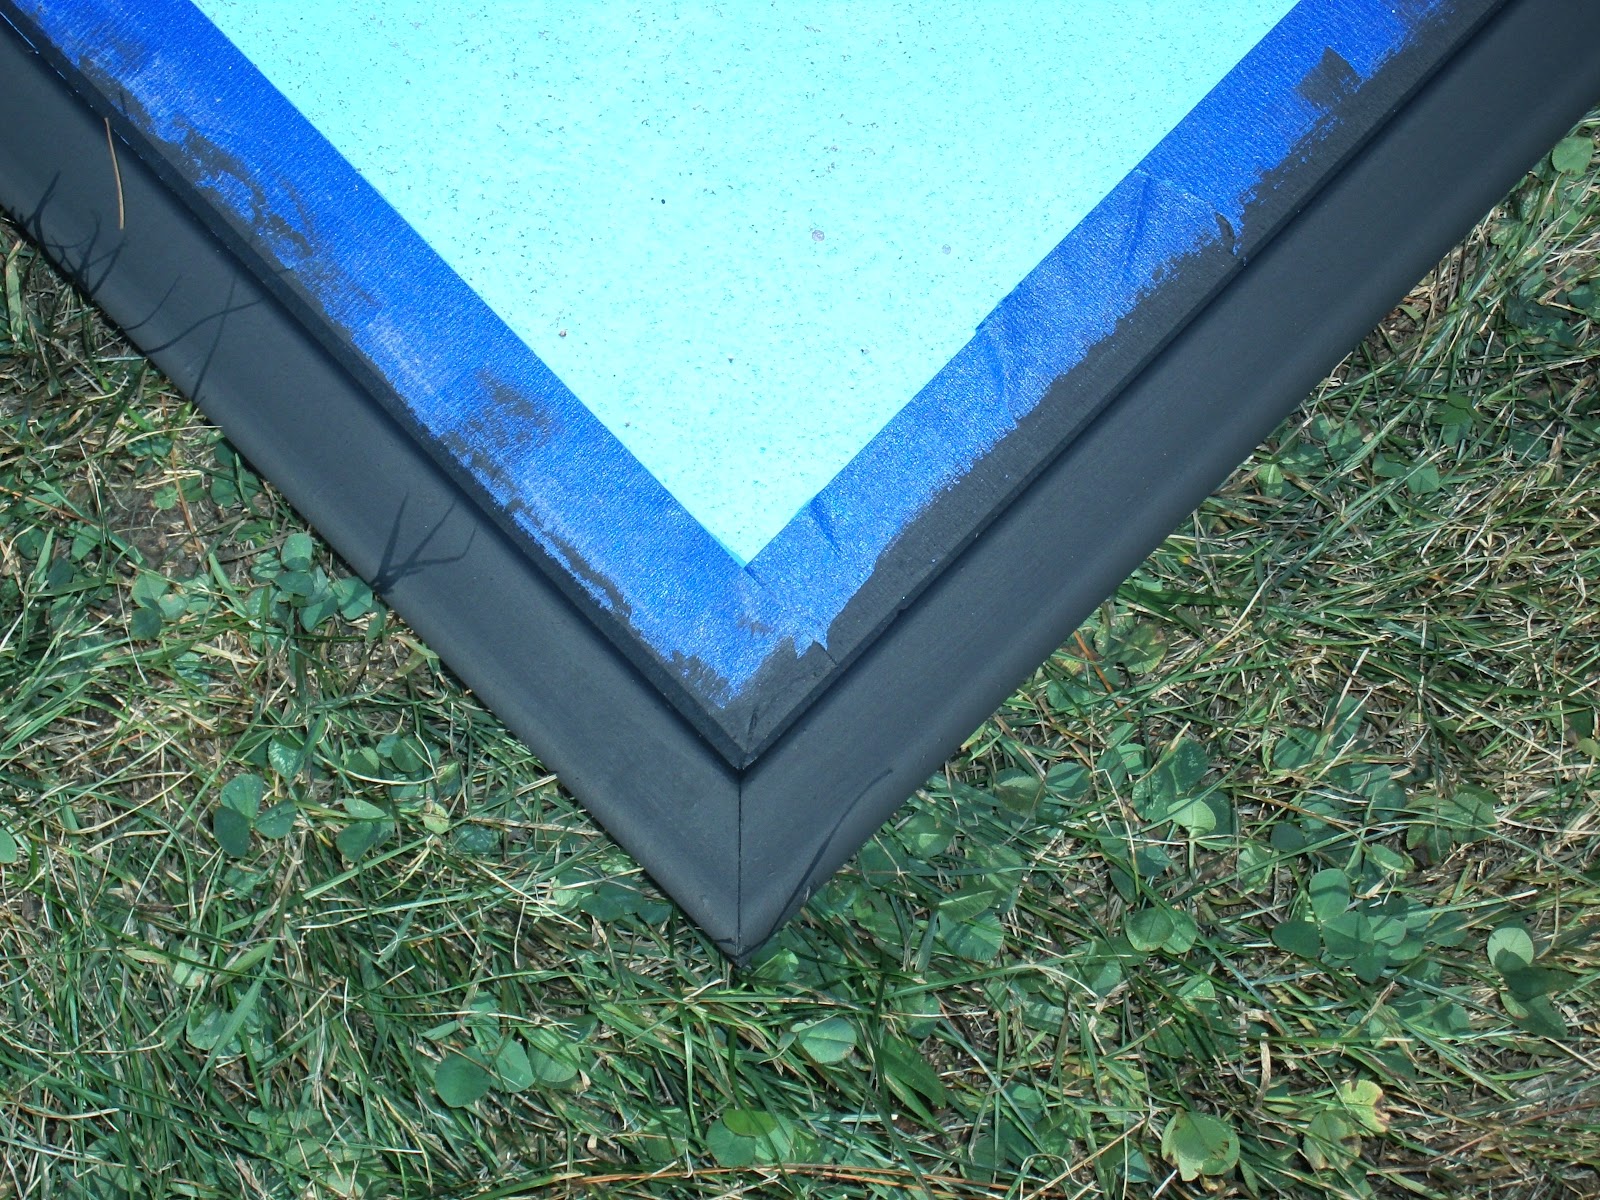
The edges painted.
  • Carefully remove the tape.
  • That's it! Now all that's left is to pin up your jewelry.


POINTERS:
    My poor cork pulled off here :(

  • I painted my board with acrylic paint.  That's fine for the border, but I don't recommend using it on the cork.  I had misgivings about it the entire time I was painting.  It didn't cover very well and I suspect it weakened the cork.  Part of mine pulled up with the tape.  Neither the iffy coverage or the bald patch is too much of an issue because the jewelry covers the board enough that it isn't very noticable.
  • If given a second chance I think I'd try using spray paint to cover the cork.  I suspect it would do a better job covering because it is less wet.
  • If your bracelets are too thick or too many (like all my bangles) to be held with one push pin you can use a wire to hold them like I did  HERE!

Bracelet Solutions


When I made my jewelry board I found I had a lot of bracelets.  Not only did I have too many, some were much too wide to fit on a pushpin.  My solution?  Well it may not be elegant, but it certainly does the trick.  A bit of wire is all you need!

STEPS:

The wire I used was 20 gauge and it's easy to find at any craft store.  This thickness seems to work well.  It is strong enough to hold up the bracelet weight, but flexible enough to be easily shaped.  I cut a length of about 5inches.
Wrap the end of the wire in a loop with pliers.  If you don't have any available you can probably just wrap the end around a pencil or something similar.
Twist the extra end back around the body of the wire so the sharp end doesn't stick out.
Repeat these steps with the other end of the wire and bend the wire in half to create a hook.


 The hook should easily fit your bracelets.

\
To pin just insect the pushpin into both of the loops.  Make sure you're careful when you remove it though - if you just pull out the pin the entire pile of bracelets will drop.

That's it!  It's that easy to organize your bracelets.


To learn more about my jewelry board or how to make one yourself click HERE.


August 26, 2012

Jeans Repurposed

So, being the packrat that I am,  I have a lot of old jeans that I can't wear out in public but also just can't throw away.  Luckily, this pair was only worn out down the leg so I was able to make this super-cute skirt!


To make this skirt I simply cut my pant legs off and added an orange circle skirt.  The best pattern I've seen for a circle skirt is here on MADE so if you're interested in making one of your own you should check it out. Although, if the top of your skirt is jean, like this, you'll have to remember to measure where the top of the skirt fabric will be instead of at the waist.  

I haven't sewn in awhile so my skirt is far from perfect.  There's one spot on the back where the jeans bubbled, but I think I can fix it when I find some extra time.  Otherwise it's nice.  If (ok, probably when b/c I love the style) I do it again I think I'll make the jean section shorter, as short as possible, and have the fabric section longer.  I just think the proportion is off.


BTW, I'm not a pixi and I know the photo angle is awkward, but I think its obvious there's too much jean:fabric ratio.  Not bad for picking up sewing again though.

August 21, 2012

Keeping Calm and Mashing It Up


Well the internet is crawling with them: the 'keep calm and carry on' memes. (Know the history?  Check it out HERE) I actually like a lot of them because of how clever they can be.  My favorite version so far sported the phrase 'keep calm and crayon'.  I love how it sounds similar and yet is so much more colorful. (ha)


The other big time craze is drippy crayon art.  See where this mash-up is headed yet?

Keep Calm and Crayon


Personally, love it! 

 Want to make one yourself?  Here's what I did as well as some tips.

First I printed off the words I wanted.  I taped them to a square of glass and covered the front of the glass with painters tape so I could trace the letters.  I used blue, but I recommend using a lighter color tape because it could be really hard to see the lines at times even when I held it up to the light.


Next, cut out and arrange the words as you want on a canvas.  I did the first three words white, painted it black and added the last word.  If I had to do it again I'd just do all the words the same. When it's dry add a row of crayons.  It took me about 45 crayons or so to line the bottom of a 16in canvas.  

Prop the canvas up and melt the crayons with a blowdryer making sure the letters are covered pretty well.  The next part is tricky.  You have to pull off the tape to reveal the words.  I found the hardest letters to remove were the AND because the wax was so thick through that section.  When I finished I discovered the wax had seeped through the letters for CRAYON.  The wax is so hot and liquid-y at that point I don't know if it can be prevented.  The good news is I managed to paint over it just by using my regular acrylic paint.  Since that worked so well I also decided to touch up the other words and add details to the crayon on top.


This is why I'd do the words all white next time.  The black letters just didn't get enough contrast to show up with some of the colors.  It was an easy fix though.  I just grabbed a white paint pen and added an outline.

TADA!

And so it begins . . .

My latest creative idea: start a blog.  So here I am.  If you happened to come across this in the not-to-distant future and everything is screwy, just remember I'm new at this.  Give me some time and I'm sure I'll get it all figured out.